Quickbase ODBC Pipeline - Data Warehouse Data Retrieval
| Please note that bringing MIT Data Warehouse data into Quickbase via Quickbase Pipelines requires multiple configuration steps, and significant technical expertise. These steps are designed to be used by app builders who are familiar with the Oracle client and ODBC connections, and have access to a SQL query for the data to be retrieved.
For a more user-friendly method of retrieving Data Warehouse data for use in Quickbase tables, consider Quickbase Sync for Dropbox |
Prerequisites
- Windows machine with network connectivity and MIT VPN connection
- 64-bit Oracle client installation
- Quickbase Pipelines Agent installation and configuration
- SQL query for the data to be retrieved
- Familiarity with configuring Quickbase Pipelines to map Data Warehouse data to the corresponding Quickbase table(s).
Step one: Windows machine with network connectivity and MIT VPN connection
- In order to leverage the Quickbase ODBC Pipeline connection to the Data Warehouse, you will need a Windows machine which is on the MIT network or connected to the MIT VPN at the time when the Pipeline call is executed.
- If you are setting up and testing the Pipeline in the browser of a different machine, that machine will also need to be on the MIT network or connected to the MIT VPN.
- Note that it's possible to set up the Oracle client and Quickbase agent on a Windows virtual machine on Mac, and to access Quickbase Pipelines from the browser on the Mac. If you are off campus, sign in to the VPN from both the Mac and the virtual machine.
Step two: 64-bit Oracle client
- Note that BrioQuery requires the 32-bit Oracle client. It is not recommended to install the 64-bit Oracle client on a machine that you rely on for BrioQuery queries.
- Download and install the 64-bit Oracle client.
- Test that you can successfully connect to the Data Warehouse.
- Launch Oracle SQLPlus client.
- At the user-name prompt, enter: kerbid@warehouse replacing kerbid with your Kerberos ID, the part of your MIT email address before the @mit.edu.
- You should see a success message similar to the following:
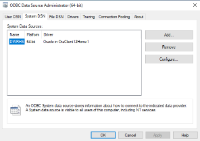
- Use the ODBC Admin tool to create a System Data Source Name (DSN) for the Data Warehouse, named DWRHS
- Open *ODBC Data Sources (64-bit)
- Open the System DSN tab
- Click Add
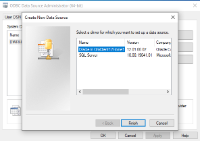
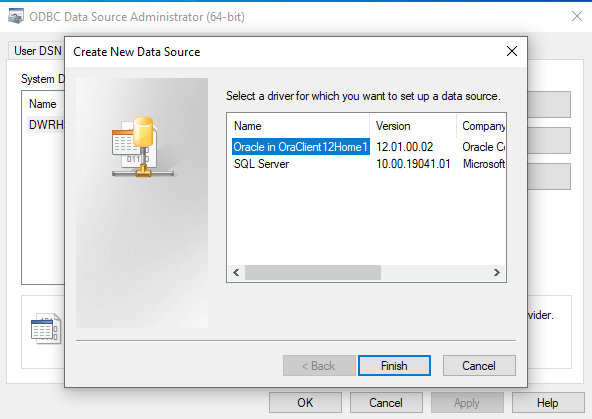
- You will be prompted to select a driver for which you want to set up a data source. Select Oracle in OraClient12Home
- Click Finish
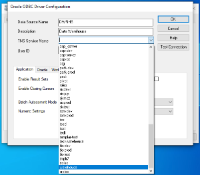
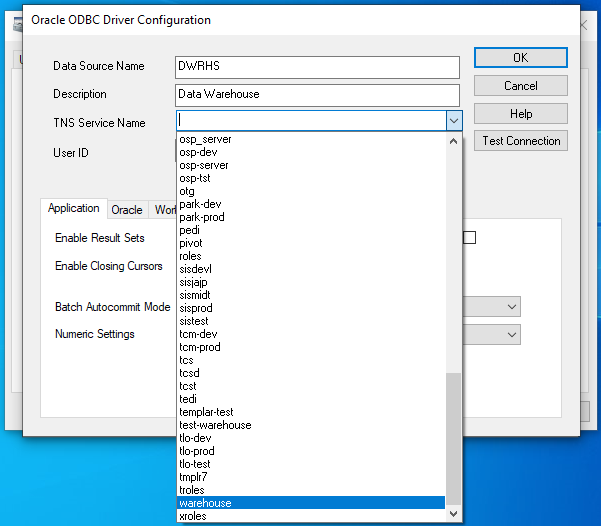
- In the Data Source Name field, enter DWRHS
- In the Description field, enter Data Warehouse
- From the TNS Service Name dropdown, select warehouse
- In the User ID field, enter your Kerberos ID, which you will be using to authenticate to the Data Warehouse. This is the first part of your @mit.edu email address, without @mit.edu.
- Click OK
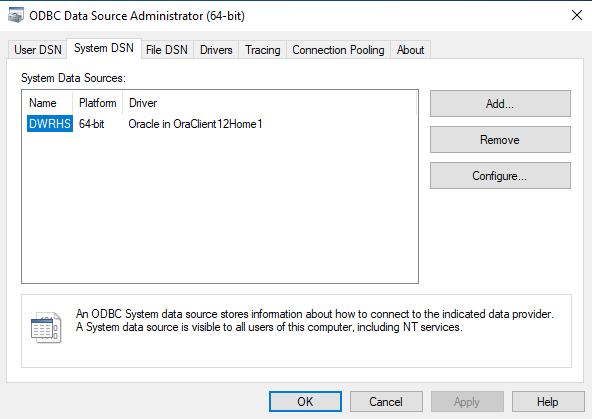
- Result You have created a System DSN 'DWRHS', which the Quickbase Pipelines Agent will be able to access.
- Click Test Connection and enter your Data Warehouse password to test the connection.
Step three: Quickbase Pipelines Agent
- On the Windows machine where you have the Oracle client installed, navigate within the Quickbase user interface to Pipelines >> My Preferences >> Agent
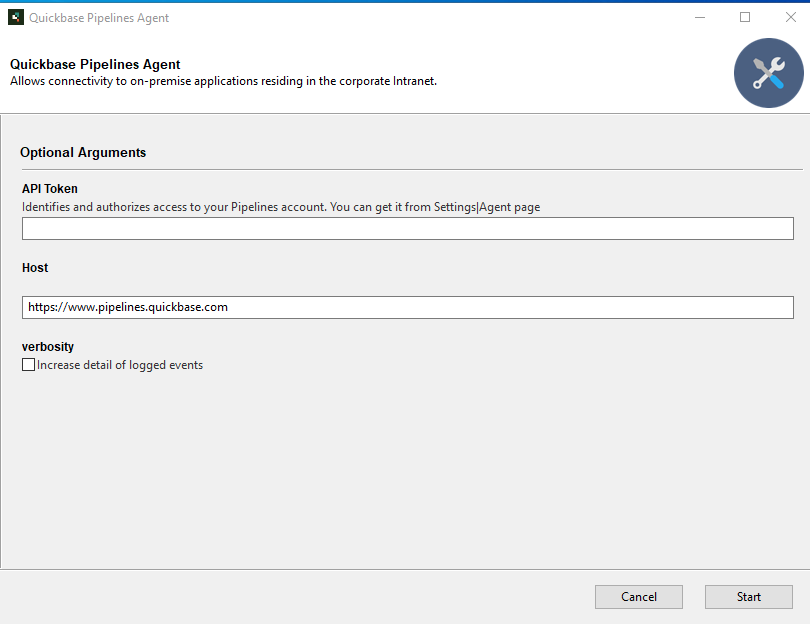
- Generate an API token which will be used by the Pipelines agent to authenticate to the Data Warehouse as your MIT Kerberos account.
- On that same page, download and install the Quickbase Pipelines agent.
- Install the Quickbase Pipelines agent. When prompted, enter your API key.

- After starting, the message should display: INFO:cloudpipes_agent_client.http_proxy:http_proxy.py:18:HTTP Proxy Server listening on 127.0.0.1 port 13128
- Note: If you receive an error "only one usage of each socket address (protocol/network address/port) is normally permitted", the service may already be running.
- Navigate to Windows Services to check whether the Quickbase Pipelines Agent is running. If needed, stop the service. Then start it from the interactive agent.
Step four: Quickbase ODBC Pipeline configuration
- These steps may be executed on the machine in which you will be configuring the ODBC Pipeline to the Data Warehouse, which may be the same machine that has the Pipeline Agent installed or any machine with a modern browser.
- Verify that you are on the MIT network or connected to the MIT VPN.
- Authenticate via Touchstone to the MIT Quickbase realm, and navigate to Pipelines.
- Click Create Pipeline.
- When prompted for Type of Pipeline, choose Manual
- In the selection for first step, choose Quickbase >> Prepare Bulk Record Insert
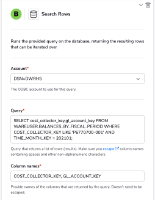
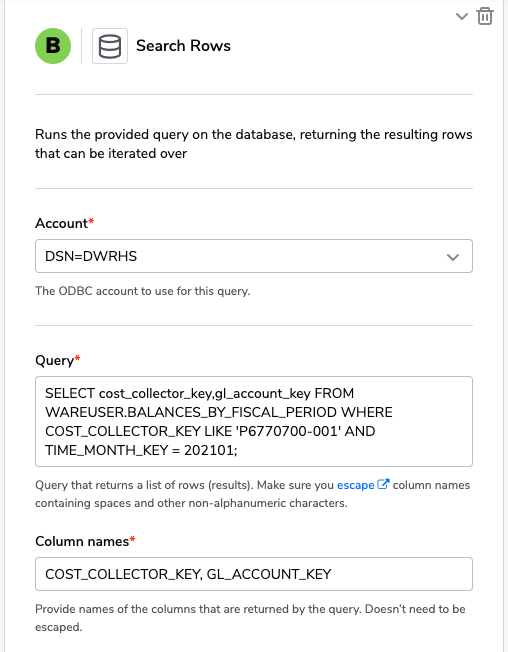
- The selection for Continue with, choose ODBC >> Search Rows
- Click Next
- In the Prepare Bulk Record Upsert section, select the relevant Table, Fields and Merge ID
- In the ODBC section
- In the Account field, enter DSN=DWRHS
- In the Query field, enter your SQL query
- In the Column names field, enter the column names for the data you will be pulling into Quickbase