
FileMaker Server 14 Configuration Instructions
| NOTE: IS&T recommends that IS&T Managed Servers be used for hosting FileMaker databases. Only experienced server administrators should attempt to do so, particularly where databases with sensitive data and/or mission critical functions will be housed. The following web page offers MIT-specific configuration recommendations to help mitigate against security risks in the FileMaker hosting environment. In a changing computing landscape these recommendations in no way offer a guaranteed maintenance or risk-free hosting environment. |
IS&T recommends that IS&T-managed servers be used whenever possible for hosting FileMaker databases at MIT. If you elect to run your own hosting environment, have secured it properly, and have experience with FileMaker Server, here is a reminder of the important recommended settings at MIT:
- Do not enable ODBC/JDBC, unless you want FileMaker to be a data source for other applications
- Do not enable web publishing, unless you are setting up a dedicated server for this purpose
- Turn on SSL encryption and install a custom SSL certificate
Note: The above list does not include all necessary settings, but represents those for which IS&T has specific recommendations.
Please follow all recommended MIT FileMaker Security Guidelines when setting up your server!
If you are uncertain of the process for setting up your server with the MIT recommendations, below is a step-by-step guide for configuring your server with our current recommended settings.
On this page:
Basic Configuration
![]() Click on the thumbnails to view the full size images.
Click on the thumbnails to view the full size images.
After installing FileMaker Server, you will be prompted to launch the Deployment Assistant.
- In the Set Up Admin Console Account window, enter a User Name and Password for accessing the Admin Console, then click Next. The user name and password can be changed later through the Admin Console.
Warning: For security reasons, do not use your Kerberos credentials.

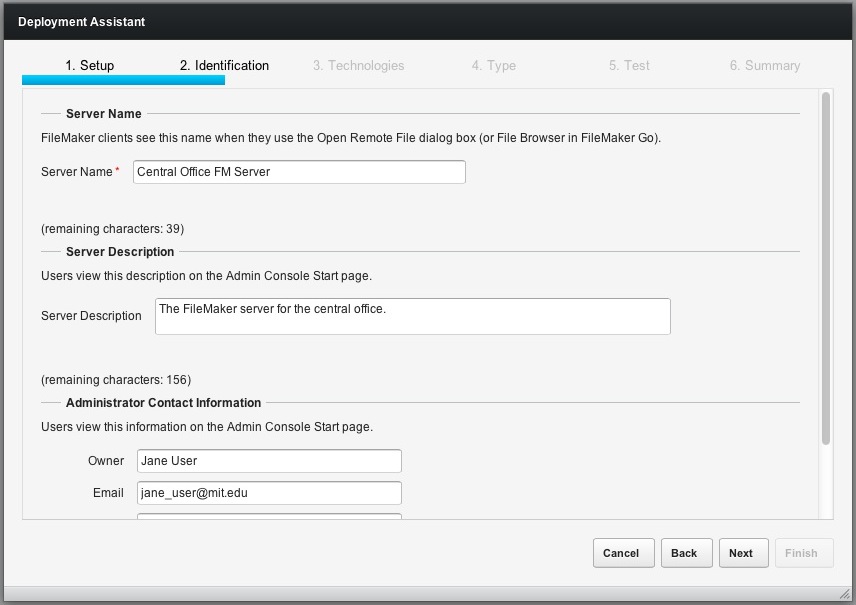
- In the Identification section, enter a Server Name, Server Description, and Administrator Contact Information for your server, then click Next. This information will be visible to the users of the database at the Open Remote File dialog and at the Admin Console Start page.

- In the Technologies section, under the ODBC/JDBC heading, select No, do not enable ODBC/JDBC.
Note: Using a FileMaker database as a data source is not supported by IS&T at this time, but you may opt to enable this feature. Unless you plan to access your FileMaker database as a source via ODBC/JDBC, do not enable it.

- Still in the Technologies section, under the Web Publishing heading, select No, do not enable web publishing, then click Next.
Note: Unlike earlier versions, FileMaker Server 14 requires that web services be enabled. In order for authorized server administrators to gain access to the Admin Console, web services must be enabled (this is done automatically by the FMS install process) and port 16000 must be open (this must be done manually). Note that enabling web services is not the same as enabling web publishing. The user will not see either the web services or web publishing settings in the Admin Console unless the web publishing feature has been enabled through the Deployment Assistant.
IS&T does not provide Service Desk support for FileMaker web publishing. However, if you choose to utilize this feature, only non-sensitive data should be published to the web. It is also best practice to not have any databases that contain sensitive data running on a FileMaker Server with web publishing enabled; this may mean that certain situations call for a 2-server setup. Please consult the MIT FileMaker Security Guidelines and the ITAG Infrastructure Requirements for Applications and Systems.
To access the web publishing feature after you have installed FileMaker Server:- Select Edit Deployment in the Server menu in the Admin Console.
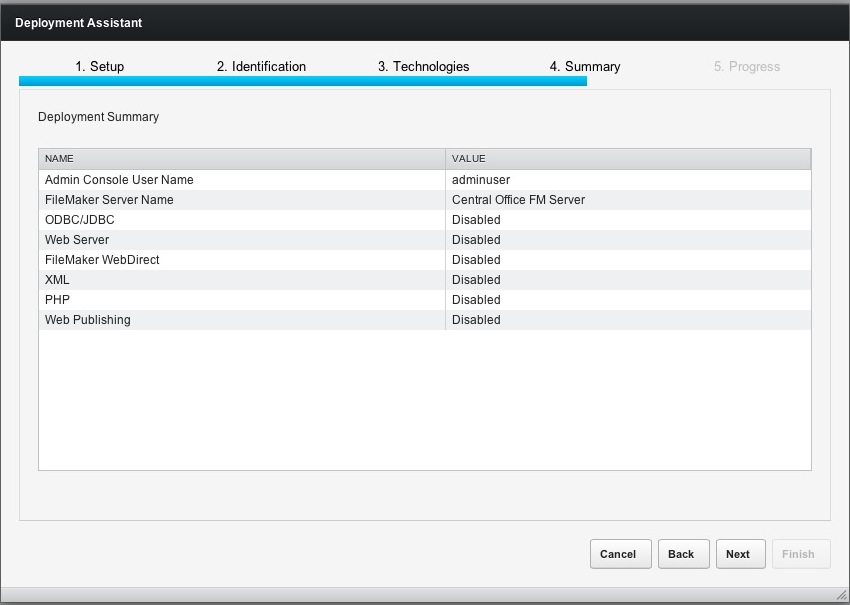
Result: The Deployment Summary is displayed.

- Click Next.

- Click Finish.
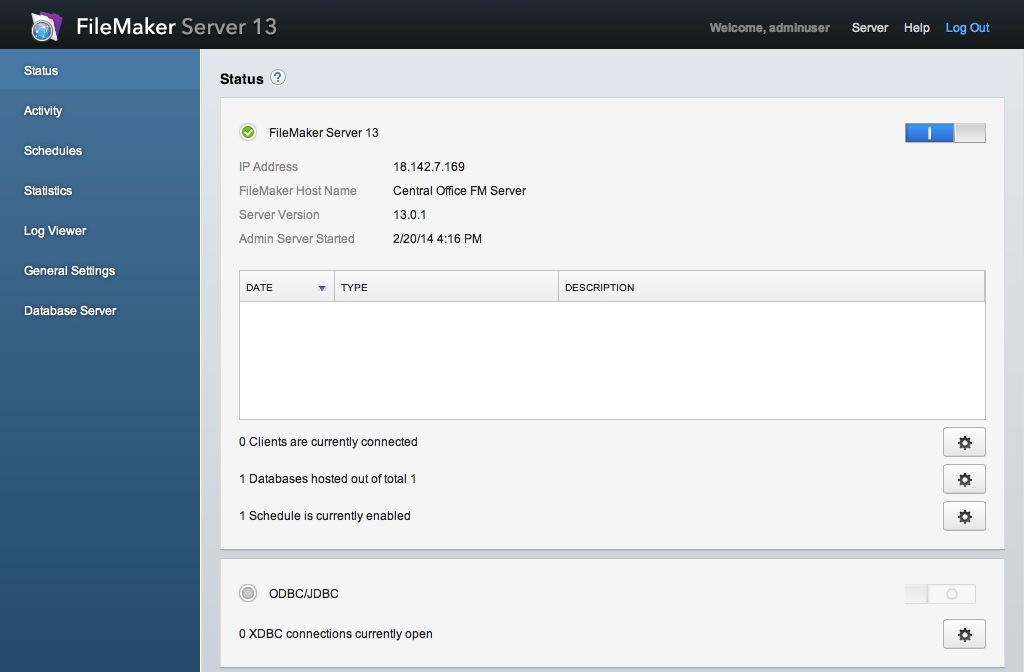
Result: The FileMaker Server Admin Console opens, and displays the Status section.

- Select Edit Deployment in the Server menu in the Admin Console.


Additional Security Settings: Enable SSL Encryption and Use File Display Filter
To limit who can see your hosted files through the Open Remote command and enable SSL Encryption:
- In the left-hand column, select Database Server.
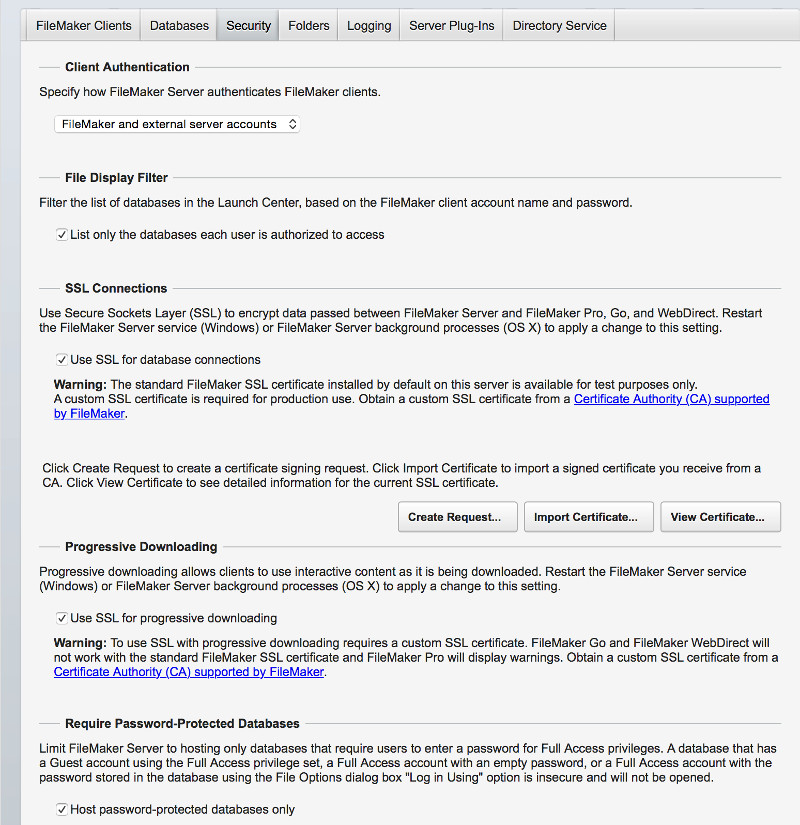
- In the Database Server window, click the Security tab.
- Check the option to List only the databases each user is authorized to access.
- To enable SSL encryption for communication between FM Server and FM Pro, under Secure Connections, check the box for Require secure connections, then click Save.

- For SSL encryption to take effect, you must stop and restart your server software (Be mindful of users who might be impacted by doing so!):
- In the left navigation bar, select Status.
- Click the icon in the upper-right to stop
 and restart
  the database server.
Custom SSL Certificates
By default FileMaker uses unsigned 1024-bit certificates when communicating with FileMaker clients and Admin Console users. At MIT we recommend use of stronger 2048-bit signed certificates for FileMaker Server rather than the default unsigned 1024-bit certificates. See [Installing Signed-Certificates] for requesting and installing 2048-signed certificates for use with FileMaker Server.
Configuring Ports
To work with FileMaker Server certain ports must be open and or available on your server machine in order for Server to communicate with various types of clients. To see the recommended port settings at MIT and for FileMaker Server, see FileMaker Server Port Settings.
Other Tasks
For more instructions on how to upload your databases, and create scheduled tasks to back them up, see Chapter 5 of the FileMaker Server 14 Getting Started Guide (PDF).
Important: FileMaker Server's backup feature creates a local copy of your databases, stored on the host machine. You should still use another mechanism, such as TSM, to back up those saved files to another secure location, in case of system failure.